Thursday, November 29, 2012

Before and After Photo Edits

Occationally, the need arises for some drastic photo edits.   It could be complexion issues, removing people or objects, or enhancements to make the shot more clean looking. 

Recently I did a wedding where the flowergirl showed up with pink-eye.  

Basically, I copied and pasted the right eye to the left eye and then rotated, erased where needed, and merged the photos.   Some edits are more involved.  

At this next wedding, we took some post wedding shots at a local downtown spot with some great water fountains.   Unfortunately, it was a very hot day, and we weren't the only ones with this idea.
A little more work was involved here.
  Mostly a lot of cut and paste, from this shot and a few others.  (Click the photo for more details of the shirtless man in the background.   I also removed the people at the take behind him)

This next photo, is from two merged images.   The sunset was behind a fence and dumpster, No way to take the photo of the couple with this in the background.  It was such a lovely sunset, I hated to waste it.   I climed up a little and positioned the camera to get only the Sunset and river background.   A previous photo from earlier in the evening worked great. 


Sometimes its just fun to play with special effects to make a photo interesting:


Monday, July 2, 2012

Fun Photos with Post-Production Edits

Making Your Photos Fun With Photoshop, GreenScreen, And Other Post-Poduction Edits

Part I

You don't need a lot of props, backdrops or backgrounds or have to travel to exotic places to have fun photos.    Why not add or enhance your photo shoots with some great post production edits.


White backdrop and umbrella for sword.   After finding an appropriate prop and backdrop, using PhotoShop, I added these to the photo and made more fun.  

I added this cute guy to a photo of a storage shed or play house.  

Then I desaturated the color and added light sepia for effect.

There are programs out there which allow you to "green screen" your photos but if you work with your set ups, and learn the edit programs, you can do this without the expense of purchasing another program for your computer.

Make your own backgrounds, or search for subjects to use.  See Below:


In this one, I took a photo of a beautiful painting and then had my neice pose similar to the subject and added her to the painting and changed the color tone to match the colors in her dress.   The original painting is titled  The Song of the Nightingale, by William Adolphe Bouguereau

Sometimes, situations prevent the ideal photo from being taken.  But with some creative thinking, you can achieve the effects you want.

I was doing a wedding last year, and wanted to take a photo of the bride and groom at sunset.  There was a large fence in the way which prevented this photo to be taken.  So, I had the bride and groom, kiss, took the photo and then went outside,  took a photo of the sunset through the fence and using photoshop layers, and cutting away the areas I no longer wanted created this great photo.  Can you tell?  

Keep an eye out here for other ideas


Wednesday, June 13, 2012

Preparing Yourself for a Photo Portrait Session

Preparing for a Portrait Session:

                      WHAT TO WEAR

I have heard some people say, "Don't wear white"
This is not necessarily true.   It all depends on your complexion, the lighting used, background and where is the white.   If you are a bride or having photos done for a Christening, you can't help but wear white. 

Wear something appropriate.
        If summer, summer clothes                                      
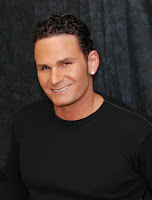
        For holidays mailers, dress for
        the season
            
Be comfortable.  
      Try on your clothes before .
       your photo shoot.          
       Make sure the clothes fit
       Match the correct colors for
       you                              
       Neck Line - vee or scoop neck is
      good for full face or short neck

~  Keep it simple                                  
         Solid colors are best.                                                
         Unless you have great arms wear sleeves     
         Avoid large or bold patterns and bright colors.          
         Coordinate your attire for full lenghth poses
         They draw attention away from the face.                   
          Darker colors usually minimize body size

~  For group photos dress everyone in the same style
        Don't mix casual and formal                         
        Keep tones similar 
        Prints arefor ties & scarves, not shirts
        or blouses       
        Don't mix seasons


                       POSING IDEAS

Your photographer should be able to direct you on your poses, but
 here are some "heads up":

~  Relax
         If you are tense, uncomfortable nervous, this will reflect
         and show in your pictures.  Take a deep breath, blow
         out slowly. Literally shake it off.  
         Shake your shoulders. Laugh, giggle, think of a joke.
         (hopefully your photographer will work with you on this)
 
~  Shoulders back
         Posture is very important.   It projects your attitude,
         and improves your appearance including making you look
         slimmer, self confident and sexier

~  Straight on facing the camera like a DMV photo is not
          normally recommended. 
          Turn one should slightly away from the camera and then
           turn your face toward the camera.  This gives a slimming
           and very flattering effect.

           Occationally, straigh on head shots can work for a special
           effect.

~  Especially for women.  Tilt your head slightly This gives a more
            relaxed and impromptude appearance and very flattering
           for the ladies. 

~  Chin down.
         Unless the photographer is higher than you.   Many people
          feel they need to lift their chin to the air.  This gives a
          strained and haughty look to the subject.   Chin down eyes
          up makes your eyes look larger.  Listen to your
          photographer and remember, to minimumize  your
          movements.   When they tell you to look up, move just a
          little, they will tell you if you need to move more. 

         If the photographer is above you, lifting your chin is great and
         helps deminish double chins.

~  Turn your back to the camera and look over your shoulder.
          Don't strain.   Only as much as you can do comfortably


Wednesday, May 30, 2012

What I need to know before getting my Wedding Photographer

Question: What kind of things do I need to know, plan or ask for when getting my wedding photographer, and what type of photos should I do?
Answer: I don't think a lot of brides and grooms think about this when planning their weddings, or they have the question, but not the answer.
Several things to keep in mind before deciding on your photographer:


1. What kind of photos do I want.

- PREWEDDING PHOTOS - Bride getting dressed, bride's family and bridal party photos (no groom) Groom and groom's men photos with groom's family (no bride) Some couples do not stick to the traditional "bride and groom do not see each other prior to wedding" and opt for photos here. Keep in mind, any photos done prior to the wedding, will save time between the ceremony and reception, so your guests will not be waiting at the reception for you as long.

- CEREMONY PHOTOS - Outside or inside? If in a church, temple or other type of sanctuary, photography may be limited. Does the church allow flash photography, or any photography during the ceremony? How close can the photographer get? How dark is the room. Are you OK with mock-ups of certain events during the ceremony which may not be photograph able (ring exchange)

- POST WEDDING - Where and how much time are you wanting to spend on post wedding photos. Will the weather be good for outside? Do you have a back-up plan in case of in climate weather? I advise you not have your wedding guests wait longer than an hour if possible at the reception hall, waiting for you. (make sure you have music and food for them)

- RECEPTION - Inside or outside? What kind of photos do you want for your reception, and how long do you need to have the photographer at your reception? Most receptions lasts between 3 to 4 hours. Do you need to have the photographer there the entire time? Have your photo ops as early in the reception as possible. Entrance, cake cutting, toasts, bouquet toss, garter take off and toss, first dance, father daughter, mother son, etc. The sooner you get your guests on the dance floor, the longer they will stay and have fun. Don't let your guests get bored. Will the photographer be taking pictures during the dinner hour? Will you feed them? Again, after the essential photos are taken at the reception, do you really need to pay them to take photos of people hanging out and dancing?

2. What can I afford?
......Shop around for photographer's in your budget, and have the above information ready to help them help you determine how much time you need.
......How may photographers will be used?
......What type of packages or options do they offer.

3. How long after the wedding before you get your photos?
......Will you get a CD or DVD of your photos? and are they high resolution or low resolution?
......Is there a print release? Copy-right release? Are you required to get your prints from them? Will you photos be online?

4. Is the photographer experienced in wedding and portrait photography?
......Have you seen printed and online photos of the type of pictures your photographer takes?
......Are they open to poses you want, and do they have suggestions for you?
......Are they professional? Are they fun (good personality)
......Do they know this is "YOUR DAY" There are great photographers out there who take beautifully pictures, and creative ones, but this should not be a painful experience for you either.

5. Were your friends happy with their photographer? Learn from them.

I am currently working on a booklet to help the bride and groom decide what and who they need for their wedding photographs. Any suggestions to put in this would be helpful. I will post here or on my website when it is ready. I will offer it online as well as in print.

Karen
www.kbaughmanphotography.com
www.facebook.com/kbaughmanphotography

Friday, April 16, 2010

I spent last week, editing photos from the UD Party and getting posted online, and I am now updating and cleaning up my website this week and next. I feel there is just too much clutter in the index.

I am using Flickr to store some old photos for viewing and instead of having 6 or 7 weddings listed in the index, I will have one page referencing the different weddings, and then create links to view them elsewhere. I will still show have one or two most recent weddings and events to view, but the listing at the top of the page will be be smaller and less overwhelming.

I am hoping this will in turn make it easier for prospective clients to view.

I also used some creative time to print and frame more photos for the studio. The walls are filling up nicely.

Feel free to stop by either place and see (online or the studio on St Nicholas Ave) The studio is small, but I am trying to make the best of it until I can afford something larger.

I will need to update some of my studio photos soon. Once we get building issues resolved, I hope to have a grand opening and open house early this summer.

Tuesday, April 13, 2010

UD Party Photos


to view UD Party Photos from April 9, 2010 click the following link

www.flickr.com/photos/kbaughman/sets/72157623848308226/

or copy and paste the above address

Sunday, April 4, 2010

Victorian Photos


I created these images in my studio using natural lighting from the picture window to the left and lots pf props (plants, vases, shear drapery). My goal was to create a portrait with a Victorian style setting almost apearing to be a painting as opposed to a photograph.
A friend of mine agreed to be my model for this set of photos. I have used her before and found her to be very effective. I particularly love the soft flow of the skirting around the knee in the far right photo and the classic "S" shape of the pose and lighting around her face.
The only editing I needed with these photos were a little cropping and some desaturation of color on two of the photos to help give a more period look. The third photo, I created a second layer and desaturated it. Then using variety of different opaque settings, deleted some of the desaturated layer to add color to the roses, the scarf, parasol, dress and and portions of the face. This gave the effect of a black and white photo which had been colorized.
I use Photoshop for almost all of my editing, and enjoy the variety and editing options offered. I have more of these photos posted on flickr. http://www.flickr.com/photos/kbaughman/4411412148/